This is the documentation for Hello! Pro version 1.x.
Hello! Pro, a WordPress Personal Branding Theme from brandiD is built exclusively for the Genesis Framework. If you have not yet purchased the framework, you can do that here.
Hello! Pro theme demo is here for your reference.
Plugins to Install
The following plugins are not necessary to use the Hello Pro theme, but we recommend these to get the maximum functionality out of your theme.
- Gravity Forms – a paid premium plugin for making contact and opt-in forms. There are many free alternatives, but we feel this one is worth the investment.
- Recent Posts Widget Extended – This plugin is recommended for using the homepage portfolio area.
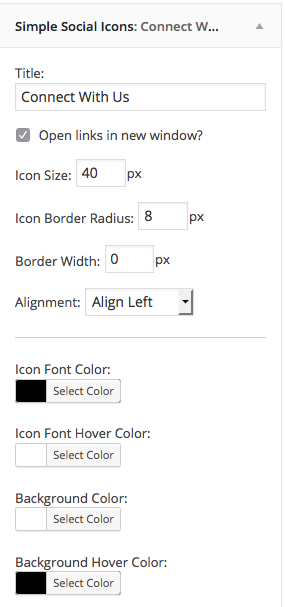
- Simple Social Icons – Used to make the social icons in the theme footer and sidebar and connect them to your social sites.
- Social Proof (Testimonial) Slider – Rotates testimonials on the homepage.
- Black Studio TinyMCE Widget – Visual Editor for widget spaces.
- Genesis eNews Extended – Easily add mailing lists integration to Hello Pro.
The fonts used in this theme are Comfortaa and Lato. These Google fonts are already included in the Personal Branding theme, and in the .zip file you received with your purchase. We recommend installing them on your computer for future projects. Get the fonts.
Theme Colors and Textures
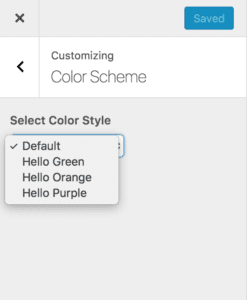
The Hello theme comes with four color and texture combinations. The grey color is the default and no changes are necessary to use this color scheme. To use the orange, purple, or gray options, from your WordPress dashboard click on Appearance > Customize. Open the “Color Scheme” menu. Choose the color option that you want to use and click “Save.”
Site Title and Tagline or Logo
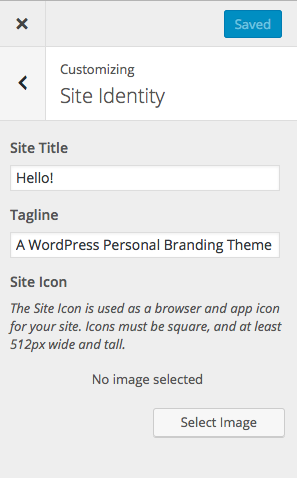
The Hello theme comes with the option to use styled text for your site title and tagline or to upload a logo image of your choice. To use the text options, from your WordPress dashboard click on Appearance > Customize. Open the “Site Identity” menu. Enter your site title and tagline, then click “Save.”
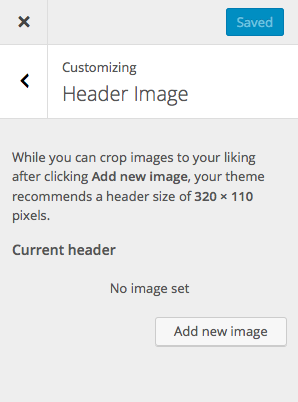
To use the logo option, from your WordPress dashboard click on Appearance > Customize. Click on the “Header Image” menu. Upload your logo file. The ideal logo size for the theme is 320px × 110px.
Sticky Header and Navigation
The Hello! Pro theme features a “sticky” header navigation that attaches itself to the top of your browser window as you scroll down. This is a great way to keep users from feeling lost as they browse your content, keep your logo and branding in sight, and it eliminates the need to return to the top of the page to access the menu items.
However, if you have very short pages that don’t require much scrolling, or if you have modified the header to have a larger logo size, you may want to consider removing the “sticky” functionality. The sticky navigation can be found in the functions.php file on line 84. Remove the entire function as shown in the snippet below.
You should also edit the theme’s style.css file, locate the following block and remove “position: fixed;” from it.
.site-header {

display: block;

position: fixed;

z-index: 1;

}
Widget Guide
The homepage, and some other featured content areas of the site are made up of widget spaces. The image shows the names of each widget space and where it appears in the theme demo. Also provided are the widget settings needed to make your site look like the theme demo. You can customize your widgets to best fit your brand. 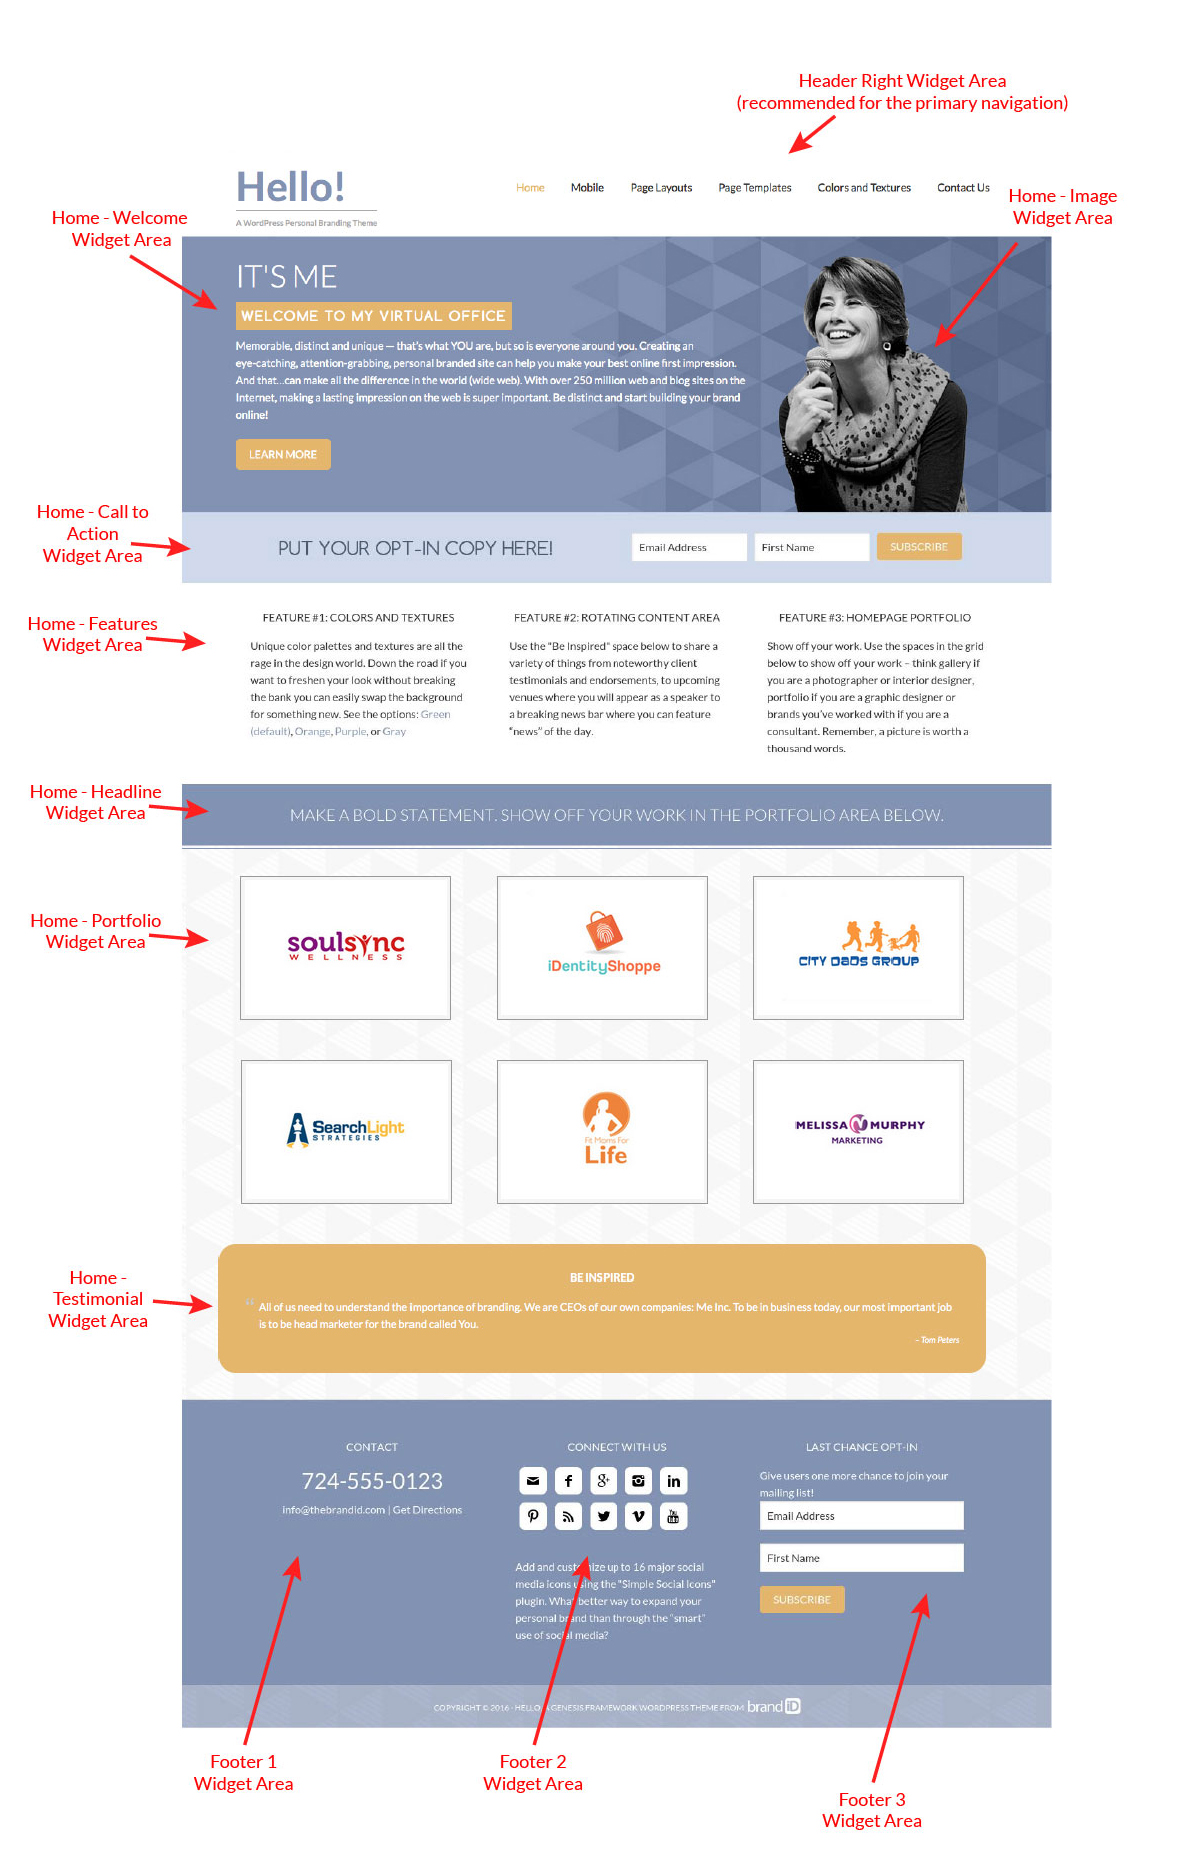
Header Right
Home – Welcome
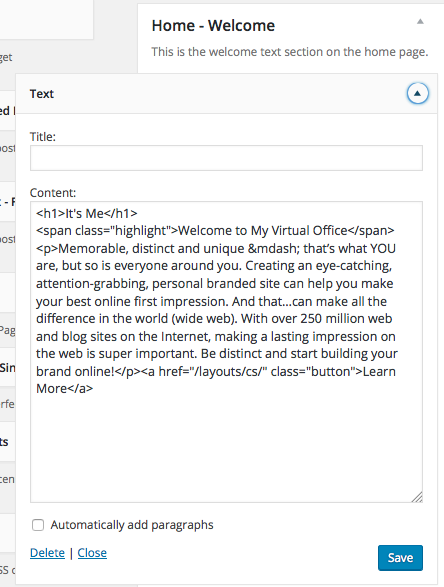
Insert a text widget into the Home Welcome area to display establishing text.
Two text styles have been pre-designed for use in this area. To get the large all uppercase text, use <h1></h1> tags around the headline text. For the text with the background color block use <span class=”highlight”></span> To add a button to any widget area, use the class “button”.
To style the widget spaces with a visual editor instead of HTML, consider this plugin Black Studio TinyMCE Widget
Home – Image
Insert any image using the visual editor widget or an HTML image tag. For best results use a transparent PNG image 315px x 380px.
Home – Call to Action
Paste your opt-in embed code in a text widget to use this space. The text in our theme demo uses the class “optin”
<span class=”optin”>PUT YOUR OPT-IN COPY HERE!</span>
Version 1.2.0 of the Hello Theme now also supports the Genesis eNews Extended plugin. Install the plugin according to the plugin directions. Set the form to only use a first name and email address. Put the text to the left of the form in the field labeled “Text To Show Before Form:”
Home – Features
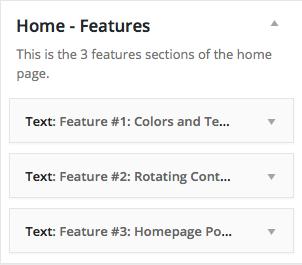
The home features area is designed to be a flexible space for you to highlight services, offerings, or other featured content. In our demo we used three text widgets, but these three spaces could accommodate any widget type.
Home – Headline
Use a text widget with <h1></h1> tags to style the text like the demo. Try other heading types or paragraph tags for other looks or to accommodate a larger amount of text.
Home – Portfolio
The homepage portfolio area is designed to pull featured images from existing posts or portfolio items. This can be configured in many ways, but we recommend the Recent Posts Widget Extended plugin to make the most of these widget areas.
Create posts or portfolio items with assigned featured images before configuring these areas.
Use the settings in the screenshot to set up six portfolio items.
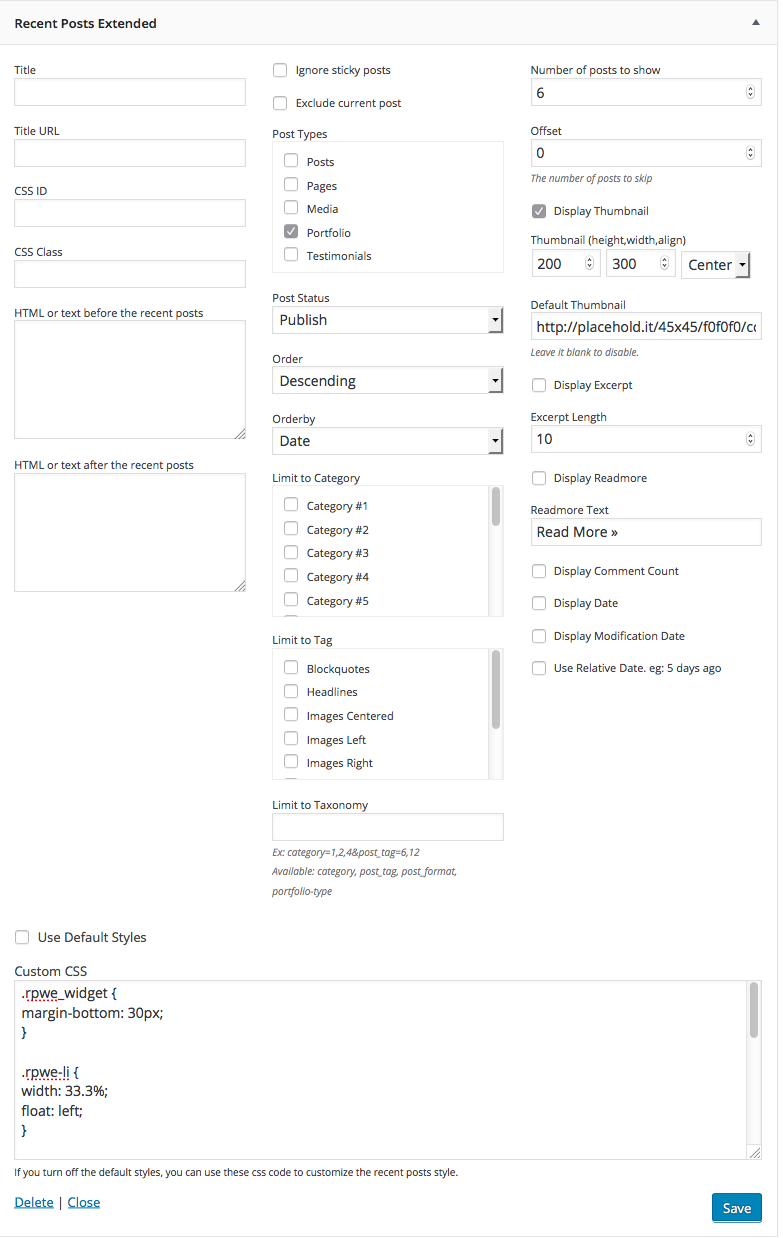
Note: For versions of the theme prior to version 1.4.0 please add this code to the “Custom CSS” field in the plugin. It is not needed in the newest version.
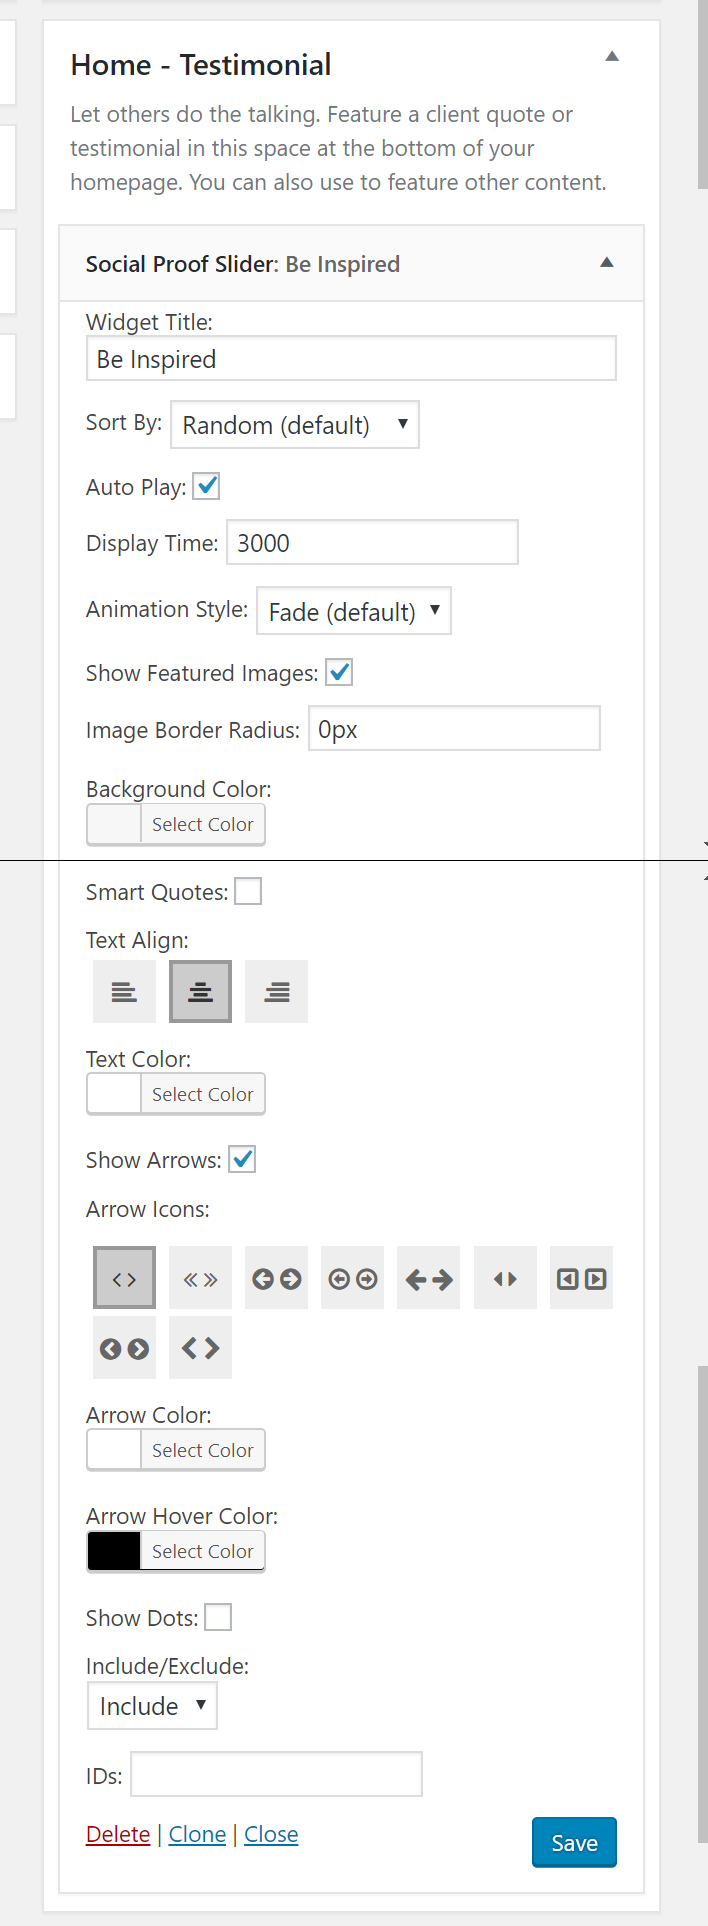
Home – Testimonial
This is a full-width widget space which can accommodate a text widget, but we recommend using our Social Proof (Testimonials) Slider plugin to rotate quotes or testimonials in this space.
Footer
Footer Widgets 1, 2, and 3
Social icons can be configured in any of the widget spaces including the primary sidebar or any of the footer widgets. The demo uses the Simple Social Icons plugin with the following settings.
Footer Copyright Text
The footer code can be found in the function.php file. The function that you need to customize the standard Genesis footer is already included in the child theme. It looks like this…
You can keep or remove anything inside the paragraph tags, without actually modifying the function, but please make a backup of your site before doing so as changes to the theme code can cause errors.
You can find more information about custom Genesis footers in the StudioPress documentation.