How to use the Customizer ‘Additional CSS’ tab to change colors on buttons or text
CSS is a programming language that allows you to change the look and feel of your WordPress website. While WordPress is an amazing tool that allows users to update many things without touching code, there are still customizations that require it. Wanna update how your buttons look, you’ll need CSS. Wanna change the padding around your text? That’s CSS again. Wanna have more control over text colors and backgrounds. Say it with me, CSS!
The easiest way to add CSS is to use the Additional CSS tab in the Customizer. The advantage to using this method is that you aren’t actually messing with your theme files, so if you accidentally add something wrong or delete something important, you won’t break your site.
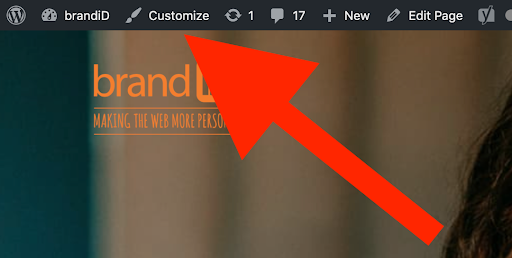
First, navigate to your site’s homepage and click Customize in the top left corner. You can also go to Appearance > Customize in your Dashboard.
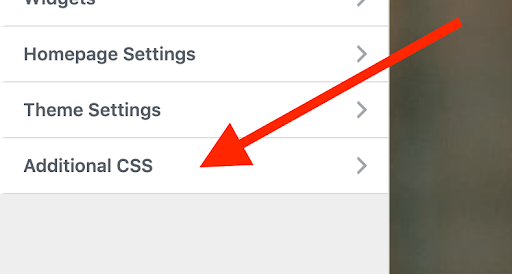
You will then see a live preview of your site along with a bunch of options in the left pane. Next, click on the Additional CSS tab.
The tab will slide to show you a simple box where you can add your custom CSS. As soon as you add a valid CSS rule, you will be able to see it applied on your website’s live preview pane.
Finally, be sure to hit Publish when you are finished so the changes will be applied to the live site.
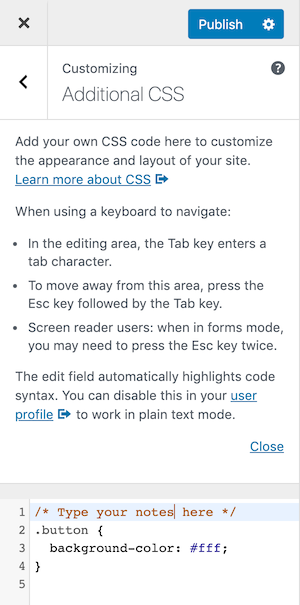
Note: You can add notes to yourself in your CSS (so you know what you’ve changed should you need to reference it later) by using the keys: /* Your note here */