How to change configuration settings in Genesis Themes
When editing your WordPress website, knowing the structure of your chosen theme is extremely important. Sometimes when using a Genesis theme, you may need to modify some of the default settings. For example, your theme may define only 3 footer widget areas, but you need 4. Or you want to update the default page layout, so each new page you create is already set to be full-width. Maybe you need the Block Editor to use a custom color palette, to match your company branding.
These are all settings which can be easily changed in the theme files, but without understanding the file structure and setup, some users may spend extra time adding unnecessary custom code — often in the wrong location — to try and change these settings. In this tutorial, I will help explain the structure of the Genesis themes, so you can save time and go directly to the settings you need to edit.
Theme Folder Structure
In this article, I’ll be going over the configuration files for our Course Maker Pro theme. Your theme’s files may differ, so we recommend browsing your theme and becoming familiar.
In the Course Maker Pro theme, there is a folder called /config/. There are several files in this folder:
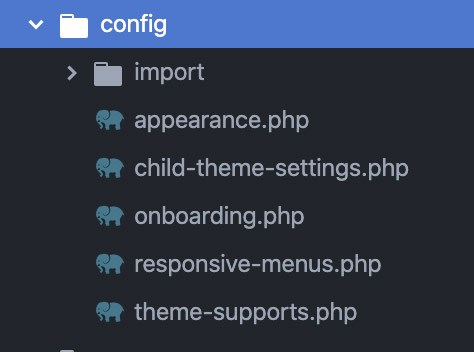
We’ll briefly go over each of these files and their purpose.
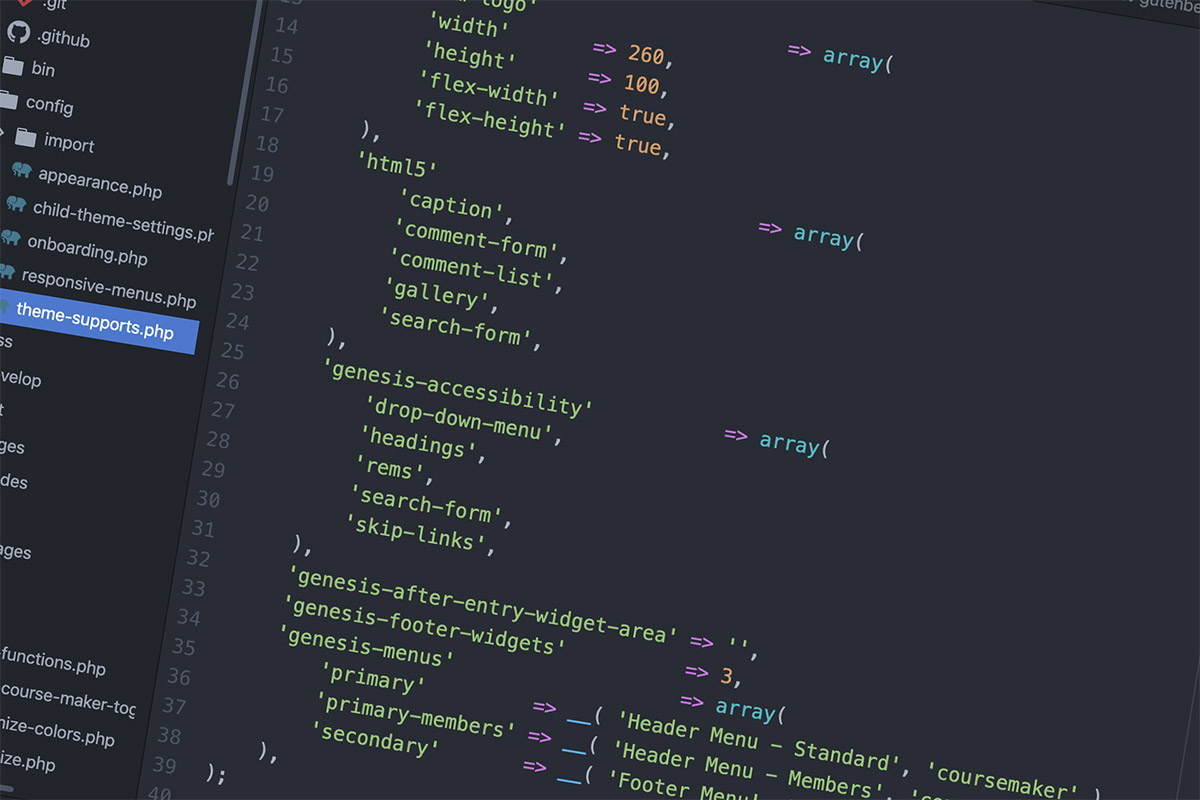
theme-supports.php
This file contains the Genesis settings for what the Child theme will support:
In order from top to bottom, these settings define the following:
- the custom logo size
- which elements will be output in HTML5 format
- which elements will be Accessibility-friendly
- whether to output a widget area at the end of the content on single blog post pages (“after entry” widget)
- how many footer widgets to display
- which navigation menus are available to edit and display
child-theme-settings.php
This file contains the default Genesis settings for the theme behavior:
It should be noted that these settings can easily be changed in the Customizer, under Genesis > Theme Settings.
In order from top to bottom, these default settings define the following:
- the default blog category ID number
- enable breadcrumbs on Homepage
- enable breadcrumbs on Blog homepage
- enable breadcrumbs on Posts page
- enable breadcrumbs on Single Post pages
- enable breadcrumbs on Pages
- enable breadcrumbs on Archives
- enable breadcrumbs on 404 page
- enable breadcrumbs on Attachment pages
- how much content to show on Archive pages (full content, excerpts)
- character limit of excerpts
- show thumbnails on archive pages
- featured image size
- default image alignment
- type of post navigation
- default site layout
- how many posts to display per page on Archive pages
responsive-menus.php
This file contains the settings for the Genesis responsive menus:
- First, we define two main Primary menus. This is for showing one navigation menu to logged-in users, and another to users who are logged-out.
- Next, we define the breakpoint at which the mobile menu will appear.
appearance.php
This file contains the settings for the Child theme’s appearance:
- First, we define an array of the default theme color palette values.
- Next, we define the colors as variables. To do this, we get the color settings the user has defined in the Customizer. If none are set, we use the defaults from above.
- After that, we define an array to contain all of the Appearance settings. This array will be passed to another theme configuration file. In the array, we define the following:
- Google Fonts embed URL
- FontAwesome URL
- The default theme color palette values from above
- The customized theme color palette values
onboarding.php
This file contains the settings used when the user runs the One-Click Theme Setup upon activation. It is not recommended to modify these settings, and doing so will not change anything after the theme is already activated and running.
Using Config Variables
Now that we have the configuration variables assigned, we can use them in other files using the genesis_get_config() function.
The genesis_get_config() function searches through the /config/ folder in your theme and looks for a filename you specify. If the specified file is found, you can save the output of that file into a variable, for using later in your code.
If you open the file /lib/load-scripts.php, you’ll see the following code:
At Line 16, you can see the code:
$appearance = genesis_get_config( 'appearance' );This line does the following:
- Look in the theme’s /config/ folder and find a file called appearance.php
- Save the output of that file to a variable named $appearance
Then right below, we use that $appearance array variable to output the Google Fonts URL (we defined this in the appearance.php file).
// Enqueue Google Fonts.
wp_enqueue_style( genesis_get_theme_handle() . '-fonts', $appearance['fonts-url'], array(), genesis_get_theme_version() );
$appearance[‘fonts-url’]
Another example of this usage can be found in the file /lib/output-colors.php. This file reads the color palette array defined in /config/appearance.php, and through a for-each loop, outputs the CSS styles for each color, to be used on various blocks in the Block Editor.
$appearance = genesis_get_config( 'appearance' );

$editor_color_palette = $appearance['editor-color-palette'];

foreach ( $editor_color_palette as $color_info ) {

    $css .= "

    .site-container .has-{$color_info['slug']}-color,
    .site-container .wp-block-button .wp-block-button__link.has-{$color_info['slug']}-color,
    .site-container .wp-block-button.is-style-outline .wp-block-button__link.has-{$color_info['slug']}-color {
        color: {$color_info['color']};
    }
    .site-container .has-{$color_info['slug']}-background-color,
    .site-container .wp-block-button .wp-block-button__link.has-{$color_info['slug']}-background-color,
    .site-container .wp-block-pullquote.is-style-solid-color.has-{$color_info['slug']}-background-color {
        background-color: {$color_info['color']};
    }

    .site-container .wp-block-button.is-style-outline .wp-block-button__link.has-{$color_info['slug']}-background-color {
        background-color: transparent !important;
        border-color: {$color_info['color']} !important;
        color: {$color_info['color']} !important;
    }
    ";

}
Example: Add a new Footer Widget
Now that we understand how the configuration files work, we can edit the settings.
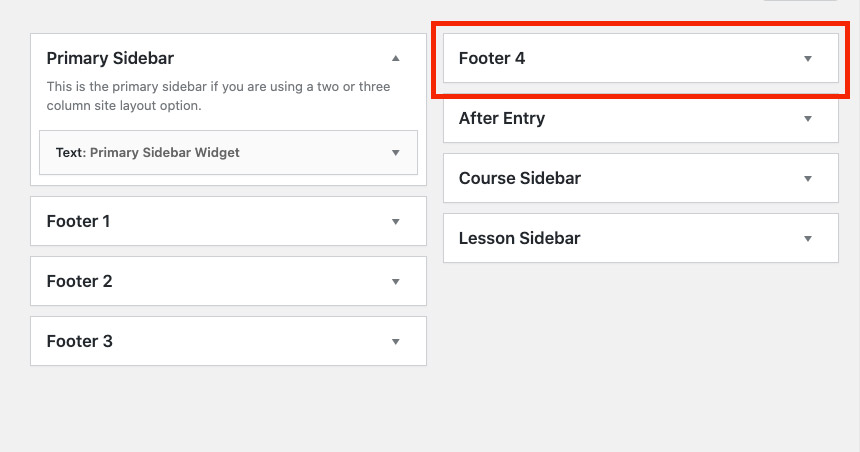
Let’s say we wanted to add a new widget area. Currently, the theme has 3 footer widgets setup:
'genesis-footer-widgets' => 3,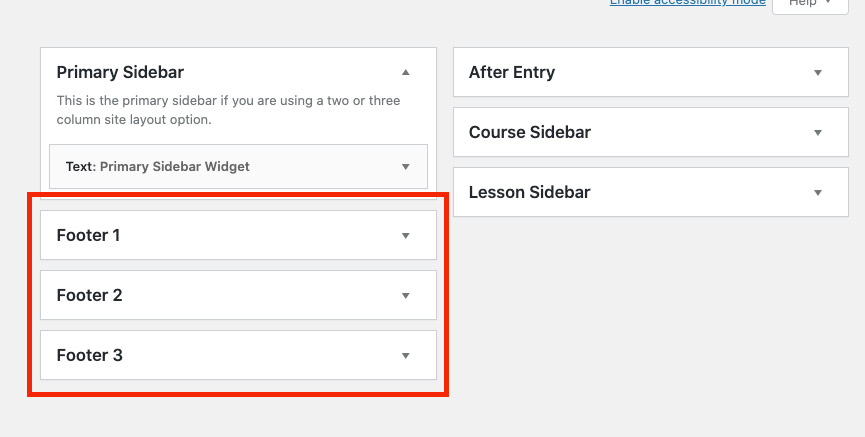
To add a new Widget area, we would simply update the file /config/theme-supports.php and update the number for the ‘genesis-footer-widgets‘ value:
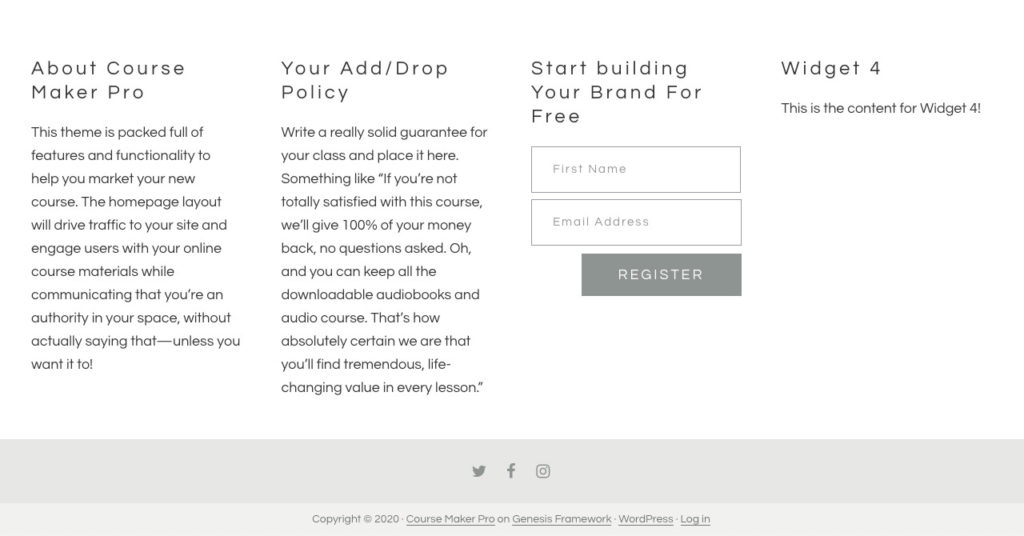
'genesis-footer-widgets' => 4,Now, the theme has an additional Widget Area:
Summary
By using the /config/ files and the genesis_get_config() function, we are able to define configuration values one time, and reuse those values in multiple locations across the theme. If you need to modify a core part of the theme, check these settings first to avoid recreating a function or code snippet which may already exist.